If you drive in Rwanda, you already know what the sun, dust, and hilly roads can do to a car over time. One of the first places this shows up is the headlights. That once-clear plastic covering slowly turns yellow, foggy, or cloudy, and before long your headlights look dull even in daylight — and weaker at night, when it matters most.
The good news? You don’t need to replace your headlight assembly to fix this. In most cases, faded headlights can be restored at home or with a quick trip to a local garage for a fraction of the cost of new parts. This guide walks you through why headlights fade, how to restore them cheaply, and how to keep them looking clear for longer.
Why Headlights Fade in the First Place
Modern headlight covers aren’t made of glass — they’re made of polycarbonate plastic, coated with a thin layer that blocks UV rays. Over the years, especially under Rwanda’s strong equatorial sun, that UV coating breaks down. Once it’s gone, the plastic underneath starts to oxidize, turning cloudy, yellow, or hazy.
A few things speed this up on Rwandan roads:
- Constant sun exposure — Kigali and most of the country sit close to the equator, so UV exposure is intense and fairly constant year-round.
- Dust and grit from unpaved or partially paved roads, especially in rural areas and during the dry season.
- Age of imported vehicles — many cars on Rwandan roads are used imports that already had a few years of sun exposure before arriving, so the clock on headlight wear started earlier than the odometer suggests.
- Frequent washing with harsh detergents, which can strip away what’s left of the protective coating.
Once you understand this, the fix makes more sense: you’re not trying to “clean” the headlight so much as remove the damaged outer layer and rebuild UV protection on top.
Method 1: The Baking Soda and Vinegar Trick (Almost Free)
This is the cheapest possible option, and a good first step if your headlights are only mildly hazy.
What you need:
- Baking soda
- White vinegar
- A soft cloth or old toothbrush
- Clean water
Steps:
- Wash the headlight with soap and water first, and dry it.
- Mix baking soda and vinegar into a thick paste.
- Rub the paste onto the headlight in small circular motions using the cloth or toothbrush.
- Rinse with clean water and dry with a microfiber cloth.
This method can lift light surface grime and mild yellowing, but it won’t remove deep oxidation, and it does nothing to rebuild UV protection. Think of it as a quick refresh rather than a real restoration — expect the haze to return within a few weeks if the headlight was seriously faded to begin with.
Method 2: Sandpaper and Polish (The Real Fix, Still Cheap)
For headlights that are properly cloudy or yellowed, sanding is the method that actually works, and it’s what most professional restoration kits are built around. It sounds intimidating, but it’s a straightforward process once you know the steps.
What you need:
- Sandpaper in a few grits: coarse (around 400–600), medium (around 1000), and fine (around 1500–2000)
- A spray bottle of water
- Masking or painter’s tape
- Rubbing/polishing compound
- A UV-protective clear coat or sealant
- Microfiber cloths
Steps:
- Wash and mask. Clean the headlight thoroughly, then tape off the surrounding paint and trim so you don’t accidentally scratch the bodywork.
- Start with the coarsest grit. Wet the sandpaper and the headlight, then sand in straight horizontal strokes. Keep the surface wet throughout — this cools the plastic, clears away debris, and gives a smoother result. Don’t worry when the headlight looks cloudier at this stage; that’s expected.
- Move to medium grit. Rinse off the residue, switch direction (top to bottom instead of side to side), and sand again. This removes the coarser scratches left by the first pass.
- Finish with the finest grit. One more pass, alternating direction again, to leave only very fine, barely visible scratch marks.
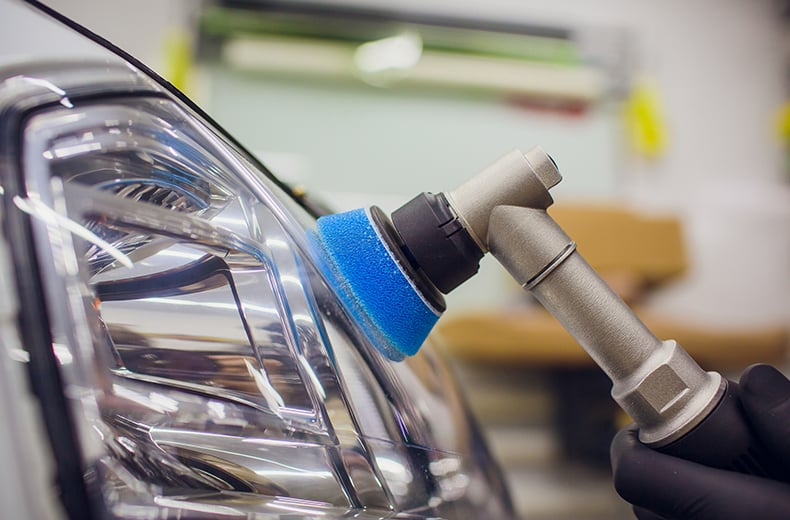
- Polish. Apply a rubbing or polishing compound with a clean cloth in circular motions. This fills in the last of the fine scratches and brings back the shine.
- Rinse and dry completely. Any moisture left on the surface will interfere with the next step.
- Apply the UV clear coat. This is the step people skip, and it’s the one that determines how long your results last. Without it, the bare plastic will start oxidizing again within months. With it, a proper restoration can hold up for a year or more, depending on sun exposure.
A full sandpaper kit with all the grits, compound, and UV coat can be bought cheaply from auto parts shops or ordered online, and it’s enough to do both headlights with some left over for future touch-ups. Compared to the cost of a brand-new headlight assembly, it’s a small fraction of the price for a very similar result.
When Restoration Won’t Be Enough
Sanding and polishing work well when the damage is on the surface. But if a headlight has deep cracks, has gone completely opaque, has water trapped inside from a broken seal, or the housing itself is damaged, no amount of polishing will fix it. In that case, replacement is the safer route — both for appearance and, more importantly, for how well your lights actually illuminate the road at night.
If you’re at that point, or simply upgrading a car with tired headlights as part of a bigger refresh, it’s worth browsing what’s available on auto24.rw, where you’ll find a wide range of second-hand vehicles already on the ground in Rwanda — including popular models like the Toyota Vitz, Toyota Premio, and Rav4, all commonly seen on Kigali roads. Buying used doesn’t mean buying tired headlights; many listings feature vehicles with well-maintained lighting, and comparing options there can save you the guesswork of restoring a unit that’s beyond saving.
Keeping Your Headlights Clear for Longer
Restoration isn’t a one-time job — it’s maintenance. A few habits go a long way in Rwanda’s climate:
- Park in the shade when you can, especially during long parking stretches in the middle of the day.
- Wash headlights gently, avoiding abrasive scrubbing or harsh chemical cleaners that strip the coating faster.
- Reapply UV sealant roughly once or twice a year, even if the headlights still look clear — prevention is cheaper than another full sanding job.
- Check headlights during routine servicing, the same way you’d check tyres or brake pads.
For more practical, Rwanda-specific maintenance tips like this — from keeping your car cool during the dry season to prepping it for upcountry drives — automag.rw covers a wide range of guides worth bookmarking for any driver here.
A Word on Going Electric
If you’re already spending time and money keeping an aging vehicle running smoothly, it might also be worth looking ahead. For drivers exploring more sustainable options down the line, EV24.africa offers import options for electric vehicles, opening up more choices for Rwandan buyers as EV adoption slowly gains ground on the continent. It’s not a decision every driver needs to make today, but it’s a useful resource to have in mind as fuel costs and maintenance considerations evolve.
Final Thoughts
Faded headlights are one of those small issues that quietly get worse until they become a real safety concern. The good news is that fixing them doesn’t require a mechanic’s budget — a baking soda paste can help with light haze, and a full sandpaper-and-UV-coat restoration can bring seriously cloudy headlights back to near-new clarity, all using tools you can find locally.
Whether you’re restoring the headlights on your current car or shopping for a different one entirely, a little attention to this small detail makes a big difference in how your car looks — and how safely you drive at night.